The Data View and Download tool allows users to customize views containing specific loan data which can then be exported to excel and downloaded. It also allows authorized users to create, save, and delete views.
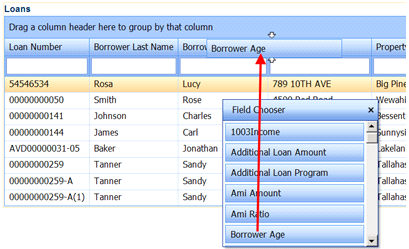
Decide what information should be included as part of the view then click the Field List to display the Field Chooser.
Drag the fields to be included in the view individually from the Field Chooser to the Loans grid and place them it in order which the information is to be displayed on the view. To remove a field from the report, drag it from the grid back to the Field Chooser.
Drag a selected field into the area directly above the header fields labeled Drag a column header here to group by that column to group by that particular field.
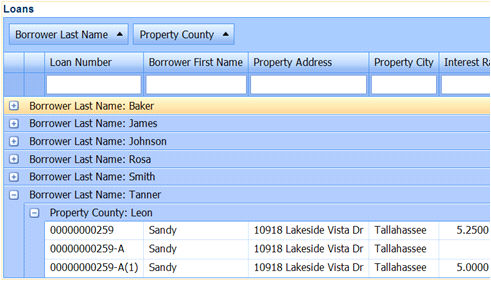
Drag another field in order to subgroup within that main grouping. (For example, to group by last name and then sub-group by county, first drag the Borrower Last Name header then the County header.)
Check Global View (Visible to everyone) to make the view global so everyone can see it (if desired). If not, leave unchecked to save the view as a private view.
Click the Save button to save the view and return to the Data View & Download Tool.
Click the Export
to Excel icon ![]() after
creating the required view to download the data in the required format.
after
creating the required view to download the data in the required format.
Click OK to display the File Download screen.
Click Open to display the report on the screen, or click Save and select a location to save the file.
Click the Delete View button on the tool bar while in the view.
Click the Delete button on the Delete View screen to remove the view.